Move from Android to iOS? How to Get Started with iOS Device
By Carrie Tsai, Last Updated: November 17, 2020HOW TO
Recently, Apple's 5G-enabled iPhone 12 models eventually came after a long await and have been all over the world in sales. If you've been using Android long enough but have ditched the old Android phone for such a new iOS device, then congratulation! You're making a great option for that you're investing in a device allowing you to make the most of it which comes with an operating system that is simple and intuitive to use and a healthy apps ecosystem.
However, when switching from Android to iOS, you're totally new to an iOS device. Whether it's an iPhone or an iPad, after unboxing such a brand-new iOS device which you never used before, you must be at a stand with a tinge of fear of the unknown. Well, it's just OK to have such fear - fear of the unknown and that you'll making a mess of it. After all, new technology is intimidating.
Take it easy though. Our handy guide here is going to help you get started with your new iOS device by walking you through the first things you should do when you move to iOS. Once you read the guide, you'll be starting well on your path to becoming an iOS pro.
Also Read:
Apple iPhone 12 Uses Qualcomm 5G Modem: What Is Cellular Modem
Haptic Touch: Tips for Using 3D Touch on iPhone
How Do You Use Assistive Touch in iPhone
Mobile OS Review: Top 5 Mobile Operating Systems Comparison
Liquid Silicone: Why Does Apple Use It for iPhone Case
Apple Lightning VS 3.5mm Headphones: How Do They Differ
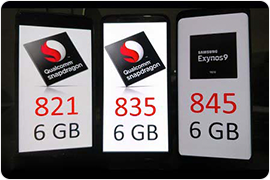
Why iOS with Less RAM Perform Better than Android Devices?
Set up Your iOS Device
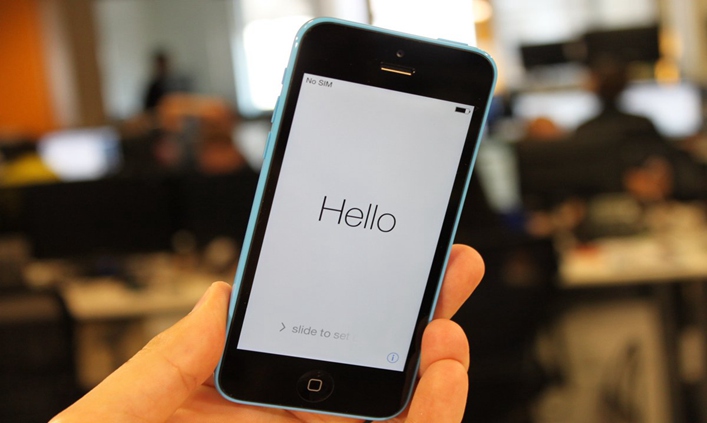
When getting your new iOS device, the very first thing you should do is power up the device and then follow the setup assistant to set up your iOS device. To turn on your iOS device, press and hold the device's power button until you see the Apple logo. Then you'll be greeted with a screen which immediately indicates"Hello"and be asked to press Home Button to open the device by a notification at the bottom showing "Press home to open". Now press the Home Button and you'll be able to open your device.
Note:
The whole setup process still takes some time. For quick tempers, they may rush through some parts in order to speed up the time from unboxing to using their new iOS devices. For the most setup parts, there's not much you need to worry about getting back to set up. But keep remembering that the device security setup process such as Apple ID, Touch ID and Face ID, if skipped during the setup process, should be revisited.
Select Your Language, Country or Region
Once successfully open your new iOS device, you enter into the setup process. The first page requires you to select your language and then your country or region. You just need to select the information based on your actual condition.
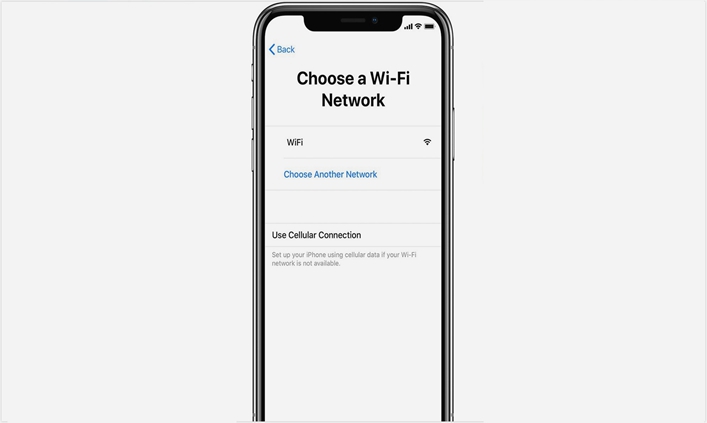
Activate Your iOS Device
At this time, to continue the setup process, you'll need to activate your new iOS device. As the page indicates, you can select a WiFi network that you want to use and log it in as your normal network or you can choose to use Cellular Connection to get mobile data. If you select cellular network, you need to activate it by inserting your SIM card in your iOS device.
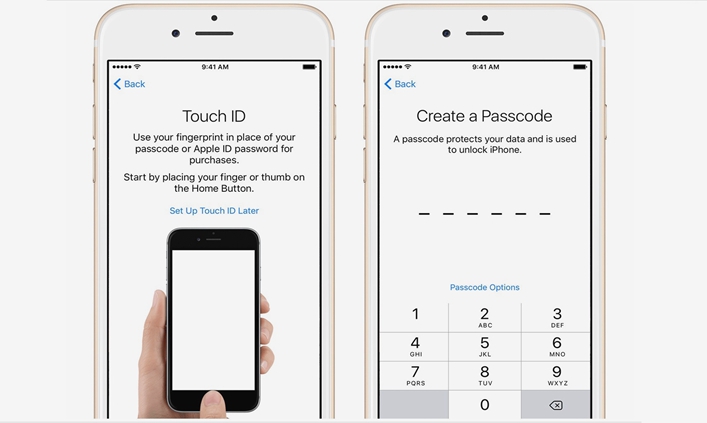
Set up Touch ID or Face ID and Create Passcode
If you get an iOS device which is an iPhone 5S or later or an iPad Pro, iPad Air 2, or iPad mini 3 or later, then your device comes equipped with Touch ID which is Apple's fingerprint scanner built into the Home Button. And if you purchase an iOS device which is an iPhone X and later iPhones, you get the Face ID which is Apple's facial recognition system. With these features, you're able to use your fingerprint or face recognition to unlock your iOS device.
If your new iOS device indeed features Touch ID or Face ID or both, you'll be asked to set it/them up at this point. To set up Touch ID/Face ID, tap "Continue"and then follow the on-screen instructions.
Of course, you can also select "Set Up Later in Settings"to set up Touch ID/Face ID after the setup process. But either way, you'll eventually be asked to set up a six-digit or four-digit passcode which is for validation and added security for helping protect your data.
Read this:
Why Does Touch ID Require Passcode When iPhone Restarts
Whether you set up Touch ID/Face ID during the setup process or afterwards, both of the features should be enabled to secure your new iOS device. They are very simple to set up and much easier to use than entering into a password.
What's more, they are not just the tools which are in place of a passcode to unlock your device, but they're also meant for making your iOS device much more secure. You can use Touch ID or Face ID when purchasing apps from App Store or iTunes. You can also use them as a security feature for Apple Pay.
Transfer Data from Android to Your New iOS Device
Now you enter into the Apps & Data screen which is to transfer data to your new iOS device. There are four ways you can choose including Restore from iCloud Backup, Restore from Mac or PC, Transfer Directly from iPhone as well as Move Data from Android.
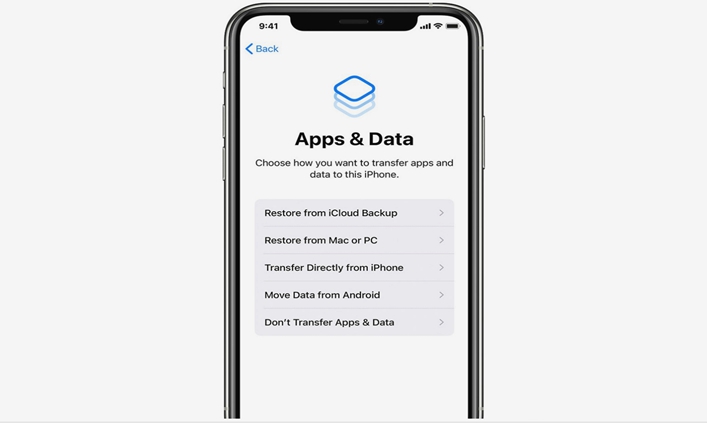
Given that you've used Android for long length of time and are totally new to iOS, you need to tap Move Data from Android to switch data from your older Android to the new iOS device. In fact, switching from one mobile platform to another is always a big pain for that transferring any photos, videos and personal content indeed takes much time and energy.
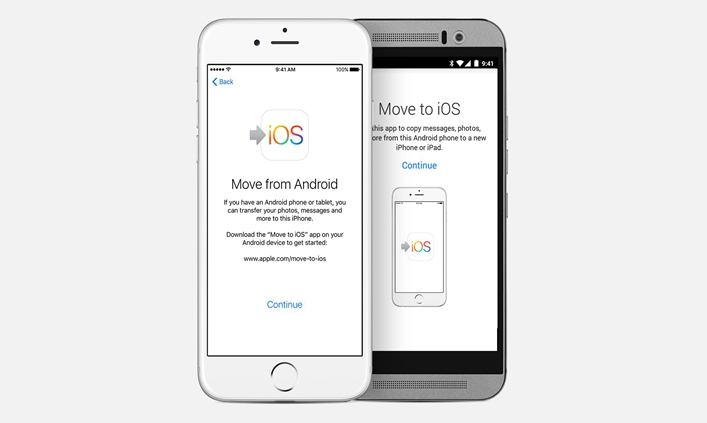
However, Apple provides a much easier way - Move to iOS which is an app allowing you to download it on your older Android device and transfer the data from the older Android device to your new iOS device.
Here's How to Transfer Data from Android to iOS with Move to iOS:
Prior to the transferring, you need to make sure that:
* Both your Android device and the iOS device are connected to a WiFi network.
* Both devices have enough power.
* The data you're going to transfer will fit on your new iOS device.
Step 1. Select Move Data from Android
To switch data from Android to iOS, you need to select "Move Data from Android" on the Apps & Data screen and tap Continue.
Step 2. Download and Open Move to iOS App
Then all you need to do is download and install Move to iOS on your older Android device. After that, open the app on your Android device and select "Continue". Tap "Agree" after reading the terms and conditions. Then to continue, tap "Next" in the top-right corner of the Find Your Code screen.
Step 3. Wait for A Code on Your iOS Device
On your new iOS device, tap the Continue bar on the Move from Android screen and wait for a code to appear (ten-digit or six-digit).
Step 4. Enter the Code on Your Android Device
Now you must have gotten the code. All you need to do is quickly enter the code on your older Android device and wait for the Transfer Data screen to appear.
Step 5. Select Your Content
On your Android device, when the Transfer Data screen appears, you need to select the content you'd like to move to your new iOS device and then tap Next.
Step 6. Finish the Device Setup
Wait until the loading bar which appears on your iOS device finishes. Then tap Done on the source device and click to Continue on your new iOS device to finish the whole transfer.
Note:
Move to iOS enables you to transfer contacts, message history, camera photos and videos, web bookmarks, mail accounts, and calendars.
The only drawback is that you can only use this feature while you set up your iPhone. That means if you have set up your iOS device already, you will need to erase the device, which is unwanted in most of the cases.
Also, there are still a few limitations by using Move to iOS app to transfer data from Android to iOS. First of all, you can only use this feature during the setup process. If you skip this setup step and would like to transfer data to your iOS device when you've already finished the setup process, you'll need to erase your iOS device and start the setup process again to use the Move to iOS feature. Besides, this feature doesn't allow you to move music from your older Android to your new iOS device.
But don't worry. There are still other feasible ways for you to move data from Android to iOS especially when you've already set up your new iOS device.
* Transfer Data from Android to iOS Using PC
It's quite easy to use PC to move data from your Android device to your new iOS device. This is because it allows for transferring almost any types of content such as music, contacts, calendars, address books, photos and videos and requires no WiFi or cellular network. All you need is just a USB cable. Now follow the guide below:
Step 1. Connect Your Android Device to Your PC
The first thing you need to do is use a USB cable to connect your Android device to your PC to sync data from Android to your PC.
Step 2. Select and Copy Content from Your Android to Your PC
When your Android device has been successfully connected to your PC, go to This PC/My PC > Internal shared storage. Then you'll see all the folders of your Android device. Now you can select the content you'd like to transfer and copy them to your PC.
Step 3. Transfer Content from Your PC to Your iOS Device
When the data has been on your PC, you'll be able to transfer them to your new iOS device from your PC by using iTunes. After that, you're able to possess the data which are placed on your older Android device on your new iOS device.
* Transfer Data from Android to iOS via Cloud Service
Cloud storage service allows you to switch data from Android to iOS device or vice versa. It transfers your data over a network connection and requires much space and that both your devices use the same cloud account.
So before you get started, make sure your devices satisfy the above requirements. Dropbox, Google Drive, Google Photos and OneDrive are the most commonly-used cloud services. You can choose one to transfer data from your old Android device to the new iOS device.
Now follow the steps below:
Step 1. Download and install the cloud service app on your Android device from Google Play Store and iOS device from App Store.
Step 2. Sign in with both apps on both devices with the same account.
Step 3. On your Android device, upload the content you want to move to the Android app.
Step 4. On your new iOS device, receive the content and download them to the storage of your iOS device.
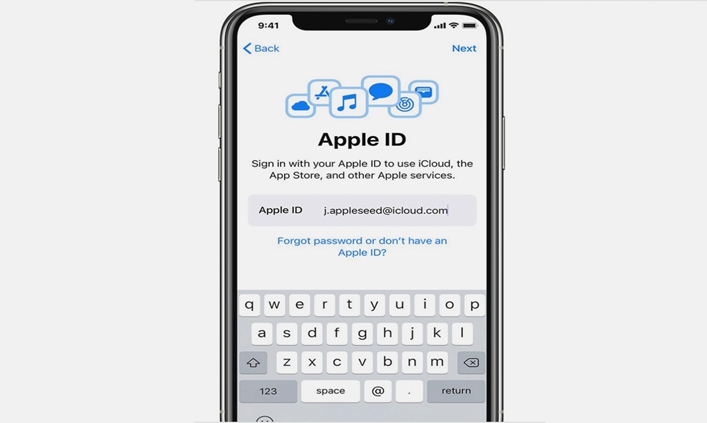
Sign in with Your Apple ID
At this point, you enter into the Apple ID setup screen. Apple ID, also known as an iTunes account, is a free Apple account which allows you to use iCloud, Apple App Store and other Apple services. It's the key for you to make the best of your new iOS device.
Without having an Apple ID, you won't be able to buy music, movies, apps and more from App Store or iTunes. Some other useful features in iOS device such as iMessage, iCloud, Find My iPhone and Apple Music also need your Apple ID.
To sign in with an Apple ID, tap "Forgot password or don't have an Apple ID?" on the Apple ID screen during the setup process. Then follow the instructions to create your Apple ID. The wait for a verification code and enter. You can also choose to set up your Apple ID later.
Since Apple ID is linked with a great number of Apple services which have lots of your personal information especially Apple Pay, it's advisable of you to enable Two-Factor Authentication for your Apple ID. The Two-Factor Authentication is an extra layer of security for Apple ID, which ensures that only the account's owner can get access to the account, even if someone else knows the password. To enable this security feature, go to Settings > iCloud > Apple ID >Password & Security.
Now, the setup assistant will walk you through setting up Siri, choosing your click (If your iOS device is an iPhone 7 or 7 Plus) and choosing your desired view. After that, you finish the whole setup process and can click to Get Started to start using your new iOS device.
When you've set up your new iOS device and start using it, there are the first things you should do which can start you well on your way to becoming an iOS device pro as well as making your new iOS device much more secure.
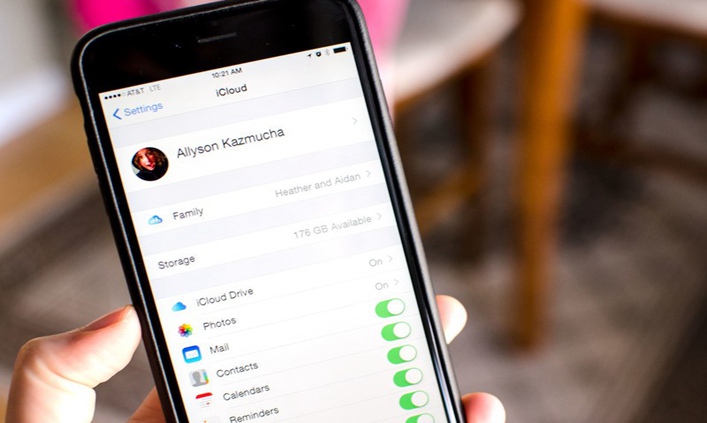
Set up iCloud for Automated Backup and Syncing
Setting up iCloud is the very first thing you should do, which can make it much easier for you to use your new iOS device. This is because iCloud account is the key to all Apple products, through which you can back up the data on your iOS device to Apple's servers and sync data across multiple devices such as your other mobile devices or your computer.
Moreover, iCloud collects your purchases of anything so if you lose or delete the things you downloaded, you're still able to get access to the purchases and redownload them.
In short, this Apple account is meant for making the data on your iOS device more secure. To set up iCloud, you can create one during the device set-up process if you haven't gone through the set-up process. If you've already finished your iOS device set-up, you can jump into Settings > iCloud to create one and sign in with it.
Note:
For some iOS devices especially the latest devices, setting up iCloud is included in the standard iOS device set-up process. You can set it up during the setup process. Of course, you can also enroll for it separately.
You May Also Read:
iPhone iCloud Supports Face ID Login, Have You Used it?
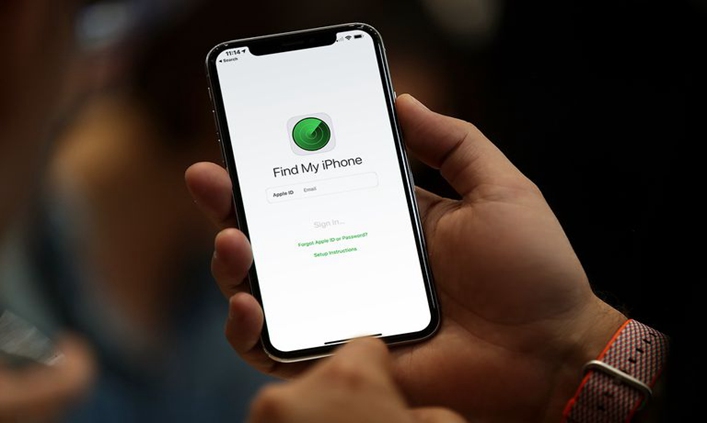
Better Secure Your iOS Device: Enable"Find My iPhone"
Enabling Find My iPhone feature is also the very first thing you should to when you're getting started with your new iOS device as it's imperative to secure your iOS device when it gets lost or stolen.
It's a feature of iCloud which uses the iOS device's built in GPS to plot your iOS device's location on a map in real time, allowing you to track down your iOS device using another iOS device or a computer once it goes lost or gets stolen. Moreover, it also enables you to remotely lock or wipe your iOS device to protect your personal information when your iOS device gets lost or stolen.
To enable Find My iPhone on your new iOS device, read the post below:
Is Your Phone Lost? How to Deal with A Lost or Stolen Phone
How to Use GPS Tracking Device on Your Smartphone
The Bottom Line
Congratulation again! You've finally switched from your older Android device to investing in a new iOS device which is easy and intuitive to use, has the best app selection as well as a powerful OS with great performance. Now you must have known how to well get started with your new iOS device in hand by learning the above tips on how to set up iOS device and the first things you should do.
And you must also want to dig a bit deeper into your iOS device such as the iOS operating system. Just take your time and take a look around our site and you'll find many more posts related which can help you become an iOS device pro.